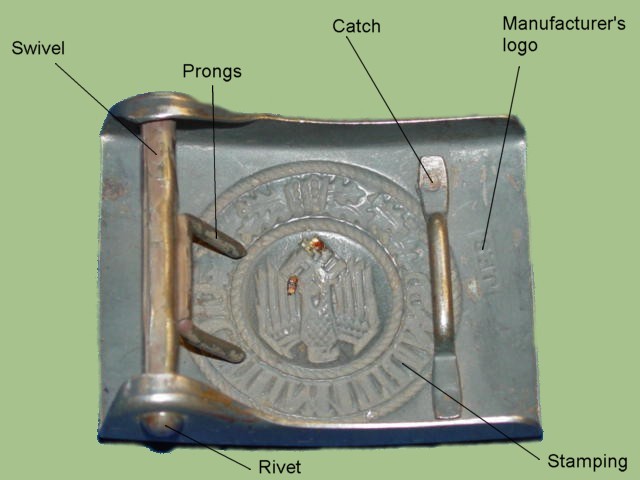
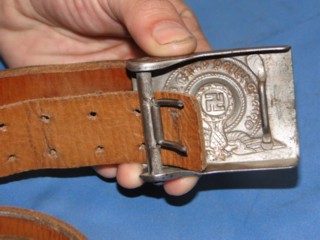
The back of the buckle reveals a catch soldered into the body of the buckle. A rotating set of prongs in
the opposite side engaged with the tonge of the leather belt, hence securing the buckle to the belt.
The Germans developed a series of different styles of belt buckles. The following are three examples of them.
 |
 |
 |
|
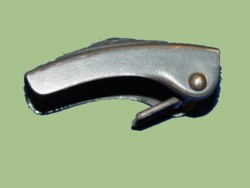
The example shown here is one of the less common types that the Germans employed. The mechanism here
works similarly to the US military belt buckle.
|
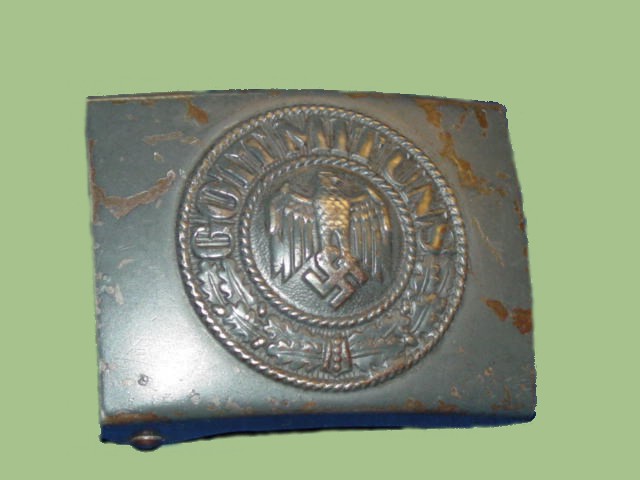
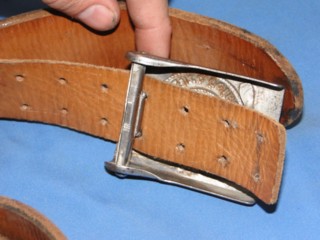
This is a side view of the German military belt buckle. The rivet held a bar where a rotating piece
with two prongs permitted the buckle to attach to the leather belt.
|
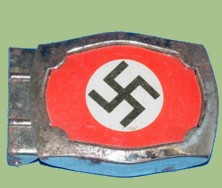
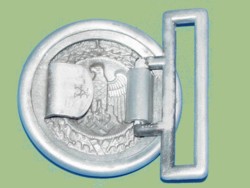
This is another type of belt buckle used by the German military. It was primarily employed by the
officers.
|
HOW TO ATTACH THE BELT AND BELT BUCKLE
As with many other products that the Germans developed during WWII, attaching the belt buckle to the belt is
a little more complicated than the systems employed by the military forces from other countries. The following
is a set of instructions that outlines how to do it.
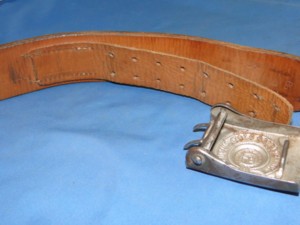 |
This photo shows the belt and a separate strap that is attached to it. The separate flap has various sets of
paired holes.
Notice that the separate leather strap is attached to the main belt with heavy duty cotton thread.
|
|
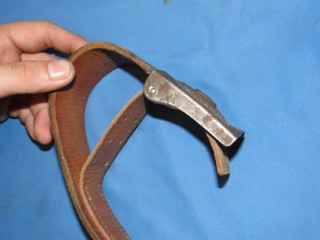
Step 1
Take the leather flap and pass it between the swivel and the body of the buckle.
|
 |
 |
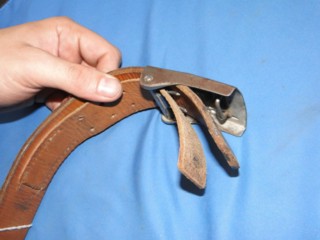
Step 2.
Select the set of holes that best fits the waist size needed. The further down the leather flap the tighter the belt
will fit the person.
Drive the metal prongs through the holes until is secured in place.
|
|
Step 3.
Once the buckle is secured to the leather flap pass the end of the belt between the swivel and the body.
|
 |
 |
Step 4.
The belt is ready for use.
|
|